Painting Laminate Furniture with Fusion Mineral Paint
Shortly before we moved into our current home, a friend gave us a piece of furniture she no longer needed. I knew it would be perfect under a window in our new home - and had big plans for a unique purpose. The only problem? The colour wasn’t exactly my style, and it is laminate furniture! In other woods, no real wood to be found. Think IKEA style - typically not known for long-lasting quality or ability to refinish it.
Check in at the end for an update on how it has held up after 10 months of use & abuse!

The “before”
Well, this is not actually a problem. Not when you have a plan and good quality paint. (This is not sponsored in any way, just sharing my process & experience because I am so pleased!)
Tools & Supplies:

-
sanding sponges in 120 and 220 grits
-
chip brush
-
stir sticks
-
rubber gloves
-
old socks (or stain applicator of your choice)
-
Pelican pail (love this!!!)
-
microfibre mini roller
-
Staalmeester oval brush
-
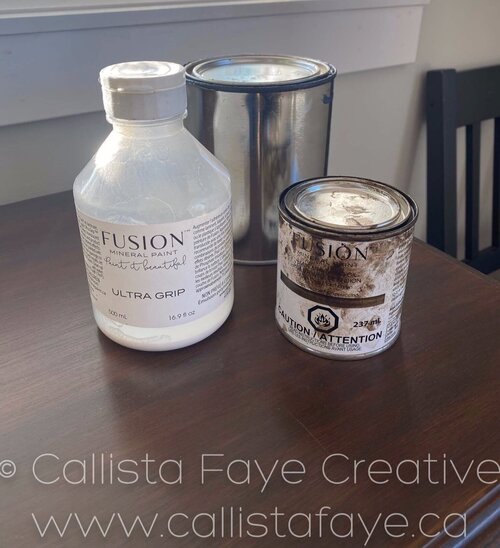
Fusion Mineral Paint Ultra Grip
-
Fusion Mineral Paint custom mix of 1:1 Midnight Blue + Liberty Blue
-
Fusion Mineral Paint Cappuccino Stain & Finishing Oil


Stain & Finishing Oil over Laminate Furniture
Now because this is laminate and not real wood, you can’t just sand it down to prepare for staining. Nor can you just go ahead & apply the stain - it won’t adhere or penetrate. What I did (after thoroughly cleaning) was gently scuff or scratch the laminate in the direction of the grain, this helps break up the shiny laminate surface and also gives a faux grain effect. Be very careful with this step, you want it to look like wood grain and not random scratches. I did a quick scuff with 120 grit to break up the surface, then 220 grit to smooth things up again. Gentle hands and staying in one direction start to finish is key here.
This video shows the sanding process, and the first two coats of the Cappuccino SFO.
As you can see in this photo, the Stain & Finishing Oil still does not penetrate into the laminate. It sits on top. I let each coat sit for several minutes before gently wiping back.

SFO before being wiped back
At the end of this video, you can also “see” the coat of Fusion Ultra Grip I did on the body of the unit. I say “see” because it dries clear, but you can hear the new texture on the laminate. (I cleaned with TSP and scuff sanded the whole thing lightly BEFORE the Ultra Grip was applied).

The top after 3 light coats of Cappuccino Stain & Finishing Oil
I mentioned I had a unique purpose in mind for this - I want to convert it into a “cat hutch” by adding a cat door on the side, and then I can feed the cats inside of it & have the doors locked to keep my helpful little helper away.
Painting Laminate Furniture with Fusion Mineral Paint
I painted the first coat with the doors on, which was foolish & I quickly removed them to get a better quality paint job done.

First Coat. 1:1 Midnight Blue + Liberty Blue (Fusion Mineral Paint)

First Coat. 1:1 Midnight Blue + Liberty Blue (Fusion Mineral Paint)
Some Fusion colours, such as Liberty Blue, are known as True Pigment colours, which means they are pure pigment suspended in a clear base. This can mean that they don’t cover as well in one coat as you might expect, especially compared to colours that have iron oxides or titanium dioxides in the base (think of Homestead Blue, which covers exceptionally well with just one coat). Don’t be afraid though - you won’t believe how beautifully the second coat goes on! Watch the video above to see it in action. I did end up doing three coats of paint on this, just because I knew it was going to have to stand up to a lot of abuse from pets & kids.

Second Coat. 1:1 Midnight Blue + Liberty Blue (Fusion Mineral Paint)
I let each coat of paint dry for 2+ hours before painting the next, and let the whole thing dry for about a day before the next step.
Applying Stain & Finishing Oil over Painted Furniture
For added dimension in the details and increased durability, I applied Cappuccino Stain & Finishing Oil over all of the painted areas. The video above shows the process in detail.
Because it is a painted surface, the SFO will not penetrate. You wipe a little on, and then buff it back. A thin coat remains with added dimension in the details. I like to use old socks over rubber gloves, one hand to wipe on and one hand to wipe back. A little goes a long way, and remember to just do a small area at a time (otherwise it may get tacky and not wipe back nicely).

On the leaf detail you can see where the SFO has been applied on the left, compared to just paint on the right.
The door on the left is only painted, compared to the oiled door on the right. A subtle difference, but I love it!

I finished the project by cutting out a hole with a jigsaw, and inserting a cat door. Arguably the hole should have been cut before painting, but I was impatient to get started & needed to buy new blades. The cat door insert covered up any chips I made while cutting, so it was all fine anyway.
I reused all of the original hardware, the vintage brass looks so his with the navy! I installed magnetic child locks on the doors, and am happy to say this suits my purpose perfectly.
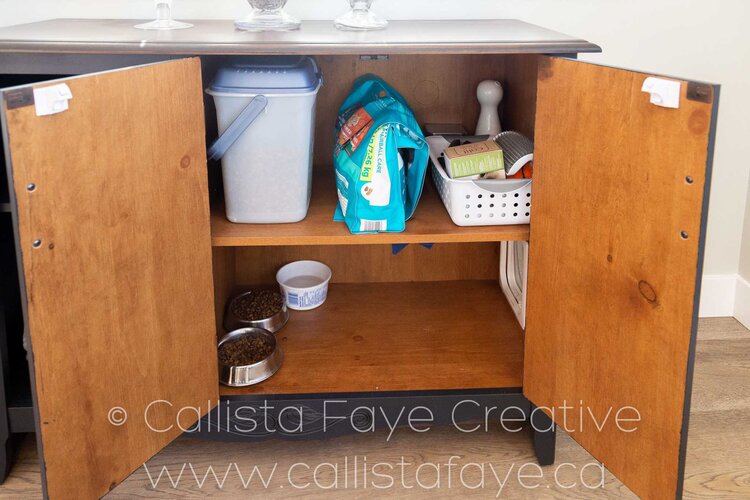
There is an outlet on the wall behind this unit, so I plugged in a nightlight which comes in through the hole that was already there (I assume this was used as a media cabinet). The cats have no issue going in or out, and there is ample room for them to both eat & drink in there at the same time. I have storage room for their food on the shelf above, as well as all their grooming supplies and treats. It is wonderful having all these things together, enclosed, and away from curious toddlers. I think the cats also enjoy the privacy while they eat.


I have since rearranged the interior a bit, but this is the general idea in case you are curious.
So, you probably picked up on the Christmas decor in the above photos. What on earth?? I actually did this project in November of 2020. It is now August 2021, ten months later, and I wanted to share because I am just so pleased with how this came together. Truthfully, I used to turn my nose up at refinishing laminate furniture. It does not have a great reputation and I was concerned with how it would hold up long term.
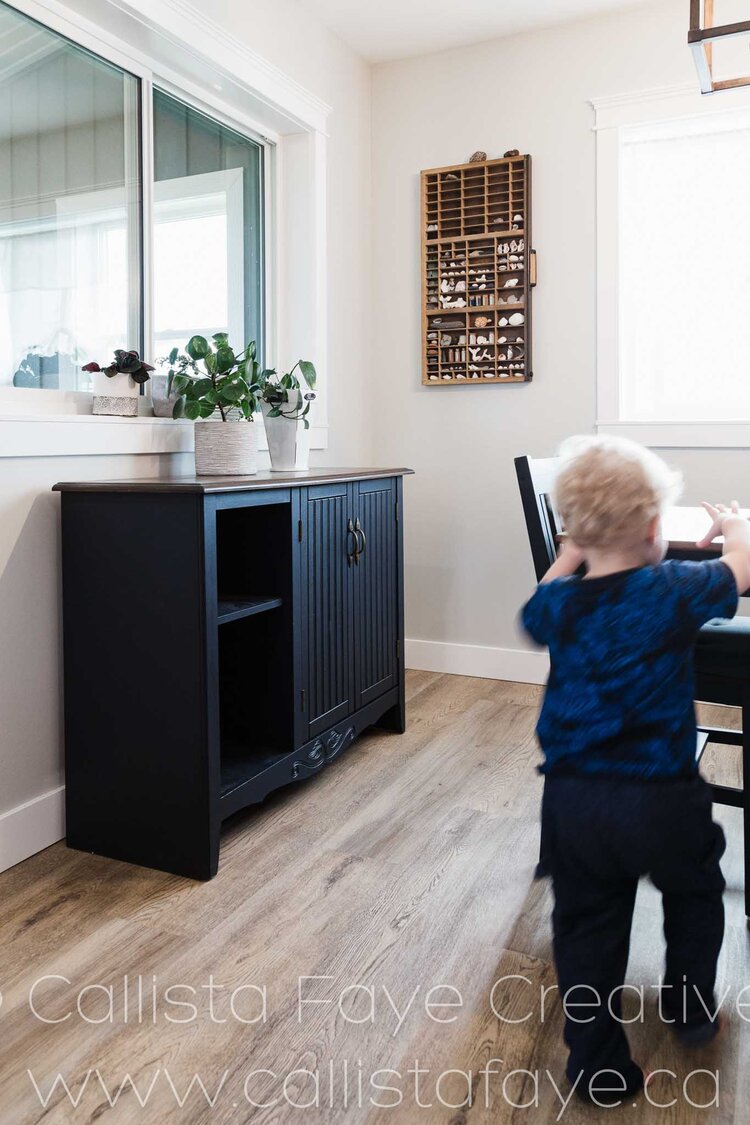
I am happy to report that this has held up beautifully, and it is subjected to a lot of daily abuse from the cats, kids, and a not-so-smart robot vacuum. And as evidenced by the dust in the below photos, you can tell I don’t maintain it that often either. The next couple of photos were taken just the other day, and you can see that it still looks just as gorgeous as the day I finished it.


I am picky about my furniture finishes, and I can honestly say that I am proud to have this piece on display in my home. It surprises me, as I was not expected to love refinished laminate furniture this much. I hope this is an inspiration for you!
