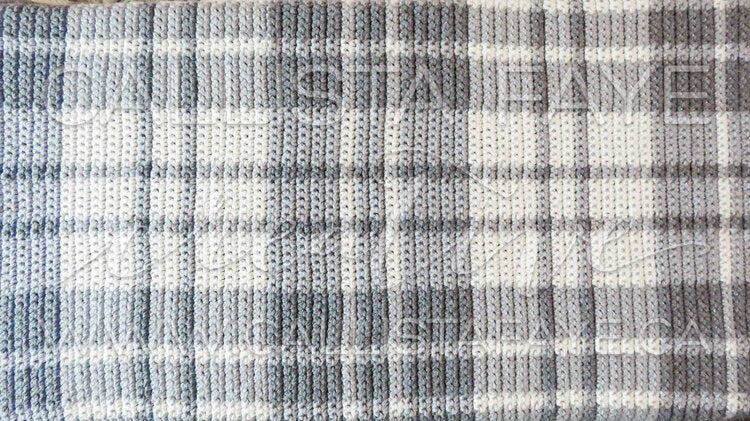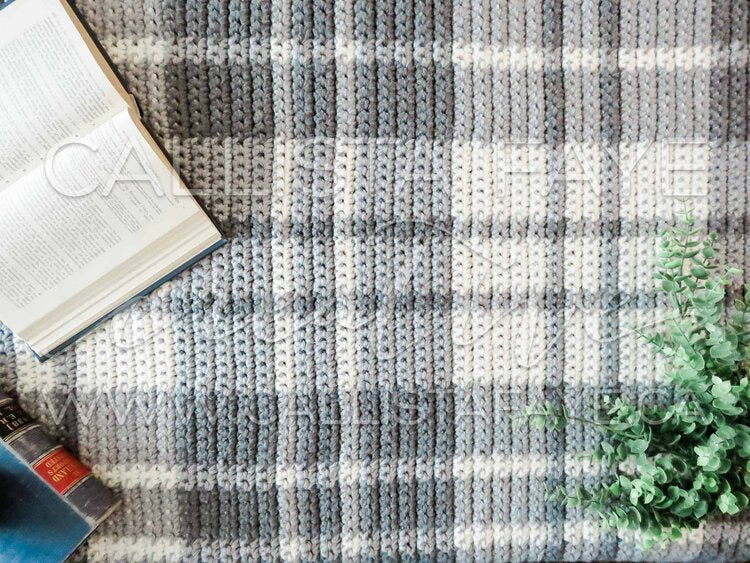
Easy Plaid Crochet Blanket Pattern (free)
Find the free pattern for this beautiful plaid blanket below. You can also purchase the printable PDF here.
Update: repeat for adjusting width added in notes.
Hi everyone! During quarantine, I picked up plaid crocheting. I have been searching for months for the perfect plaid crochet pattern, but never found anything that suited my tastes. Everything I found was typically the gingham or buffalo plaid style, but I wanted a blanket that looked more like a traditional woven plaid. Thus, I worked out this pattern that is incredibly easy to make.
Please don't be shy if you have any questions as I am new to crocheting and even newer to explaining a pattern! I will do my best to answer your queries. I also have created a YouTube video where I talk through the process and design, you can find it here if that would be helpful for you to watch.
For this project you will need 3 colours of yarn. I used Bernat Softee Chunky yarn which is super bulky (6) and recommends an 8mm crochet hook. I used the colours "Natural", "Grey Heather", and "True Grey". Because I was crocheting over my second colour of yarn (sometimes called "tapestry crochet"), I used a 10mm crochet hook. I used two 394m balls of “Natural” and “True Grey” and four 394m balls of “Grey Heather”. Please note that using two strands of super bulky makes a very thick blanket (perfect for cold Canadian winters), but if you are looking for something that transitions between seasons, I would recommend a lighter weight of yarn.
I hope that you will try this project as it is very fun and satisfying to see your efforts come together into such a nice plaid project. Happy crocheting!
Materials required for this project:
-
3 colours of yarn required (A, B, C)
-
Colour A – Natural (2)
-
Colour B – Grey Heather (4)
-
Colour C – True Grey (2)
-
-
Scissors
-
Tapestry needle
-
Crochet hook (10 mm and 8 mm)
Finished dimensions:
-
41 x 72” (plus fringe, with bulky yarn)
Stitches used in this pattern:
-
Single Crochet (SC)
Notes:
-
To create the look of plaid, you must crochet the “background” square colour with horizontal and vertical stripes running through it in a contrasting colour. Where the stripes intersect, the 3rd colour is used to illustrate the overlap.
-
You will always be working with 2 colours in each row. With the yarn colour that is currently being used to create the single crochet stitches, you will crochet over the 2nd colour that you are carrying over (sometimes called “tapestry crochet”).
-
As you crochet, before finishing the colour block that you are working on, you will pull through the 2nd colour on the last stitch. You can find a more detailed tutorial for changing colours here.
-
To increase the width of this blanket, chain 95 + multiples of 46. This will add two full colour sections in order to keep the repeat the same. (Width of each full section is 23; 7-2-5-2-7). Remember you start & end with a partial section.
You will see the full pattern for free below. You may also choose to purchase the ad-free printable PDF here.
With colour A, Chain 95
This will create a blanket that is 3 complete squares (in the middle) and has 2 partial squares on the outside edges – a total of 4 square widths.
White (A) / Light Grey (B) Partial Stripe
Row 1: With colour A, work SC into the second chain from hook. SC into next 2 chains. Before finishing the 3rd SC in colour A, pull through colour B. Continue this for each colour change throughout the pattern. Work 2 SC in the next 2 chains, carrying the other yarn colour over. Carry over whichever colour you are not working with through entire pattern.Switch to A, 7 SC. Continue working each SC into the next chain.
B SC 7, A SC 2, B SC 5, A SC 2, B SC 7,
A SC 7, B SC 2, A SC 5, B SC 2, A SC 7,
B SC 7, A SC 2, B SC 5, A SC 2, B SC 7,
A SC 7, B SC 2, A SC 3. Chain 1 and turn.
Row 2: A SC 3, B SC 2, A SC 7,
B SC 7, A SC 2, B SC 5, A SC 2, B SC 7,
A SC 7, B SC 2, A SC 5, B SC 2, A SC 7,
B SC 7, A SC 2, B SC 5, A SC 2, B SC 7,
A SC 7, B SC 2, A SC 3. Chain 1 and turn.
Row 3: Repeat Row 2.
Row 4: Leave colour A out to the side of the blanket, carrying it up along the side as you go. B SC 3, C SC 2, B SC 7,
C SC 7, B SC 2, C SC 5, B SC 2, C SC 7,
B SC 7, C SC 2, B SC 5, C SC 2, B SC 7,
C SC 7, B SC 2, C SC 5, B SC 2, C SC 7,
B SC 7, C SC 2, B SC 3. Chain 1 and turn.
Follow the graph, making the necessary colour changes as you go. Where not told to cut yarn, carry the unused colour across or up the side of the blanket.
Need help making the colour changes? Click here for a detailed video and step-by-step photo tutorial here.
Row 5: Repeat Row 4. Cut C.
Rows 6 - 15: Repeat Row 2. Cut A.
Light Grey (B) / Dark Grey (C) Stripe
Rows 16 - 25: Repeat Row 4.
Rows 26 - 27: Repeat Row 2.
Rows 28 - 31: Repeat Row 4.
Rows 32 - 33: Repeat Row 2. Cut A.
Rows 34 - 43: Repeat Row 4. Cut C.
White (A) / Light Grey (B) Stripe
Rows 44 - 53: Repeat Row 2.
Rows 54 - 55: Repeat Row 4.
Rows 56 - 59: Repeat Row 2.
Rows 60 - 61: Repeat Row 4. Cut C.
Rows 62 - 71: Repeat Row 2. Cut A.
Rows 71 - 127: Repeat Rows 16 - 71.
Rows 128 - 155: Repeat Rows 16 - 43.
White (A) / Light Grey (B) Partial Stripe
Rows 156 - 165: Repeat Row 2.
Rows 166 - 167: Repeat Row 4. Cut C.
Rows 168 - 170: Repeat Row 2.
Again, if visual would help I have a YouTube video where I go over everything in detail. And a colour change tutorial (with video and photos) as well.
Border:
To finish the blanket, use a smaller crochet hook (2 sizes down or so, adjust until your edges do not ruffle or crimp), and tightly single crochet along the 2 long sides of the blanket to lock in any of the yarn that was brought up along the side of the blanket as you worked instead of fastening it off. This gives the blanket a more completed look.
Tassels:
Add tassels to the short ends in the corresponding colour of A and B in the single crochet. Using a DVD case, wrap your yarn around until you have enough tassels for your satisfaction (I wrapped mine twice as the yarn I used was very bulky and I didn’t want my tassels to look crowded). Pull your tassel yarn in a loop through the single crochet, then hook the ends through the loop and tighten. Repeat along the entirety of the blanket, making sure to match the tassel colour to the single crochet colour.


6 comments
Tips for making this into a kind size afghan? I would love to make this for our bed. Number of skeins, how much to increase the initial chain?